Quick Start Guide: AI Development Kit Y-C18-DEV
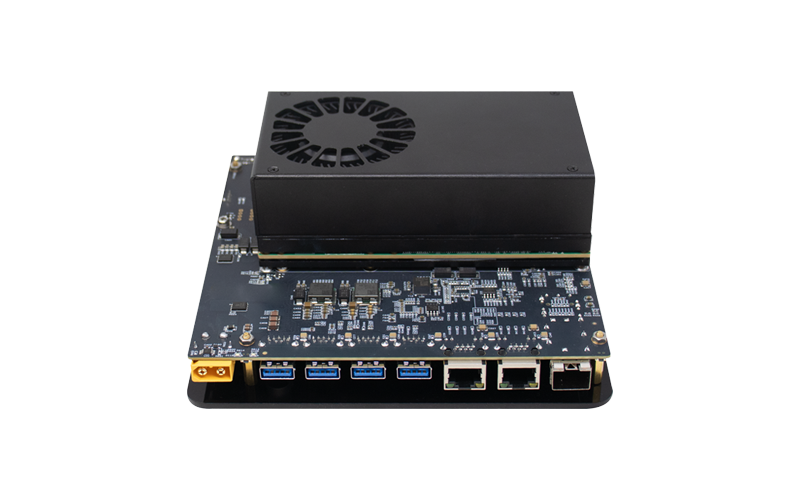
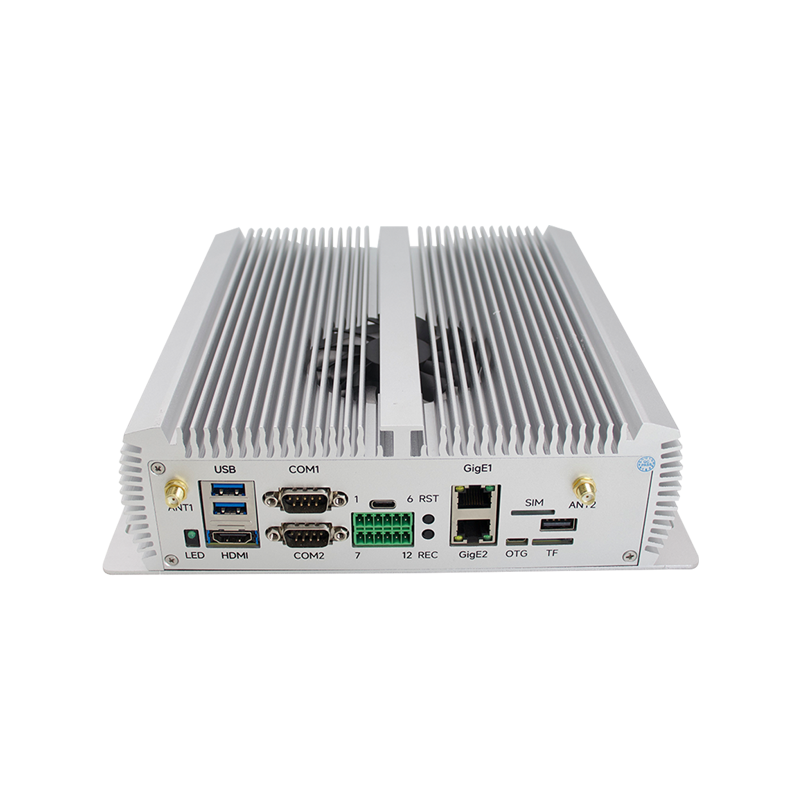
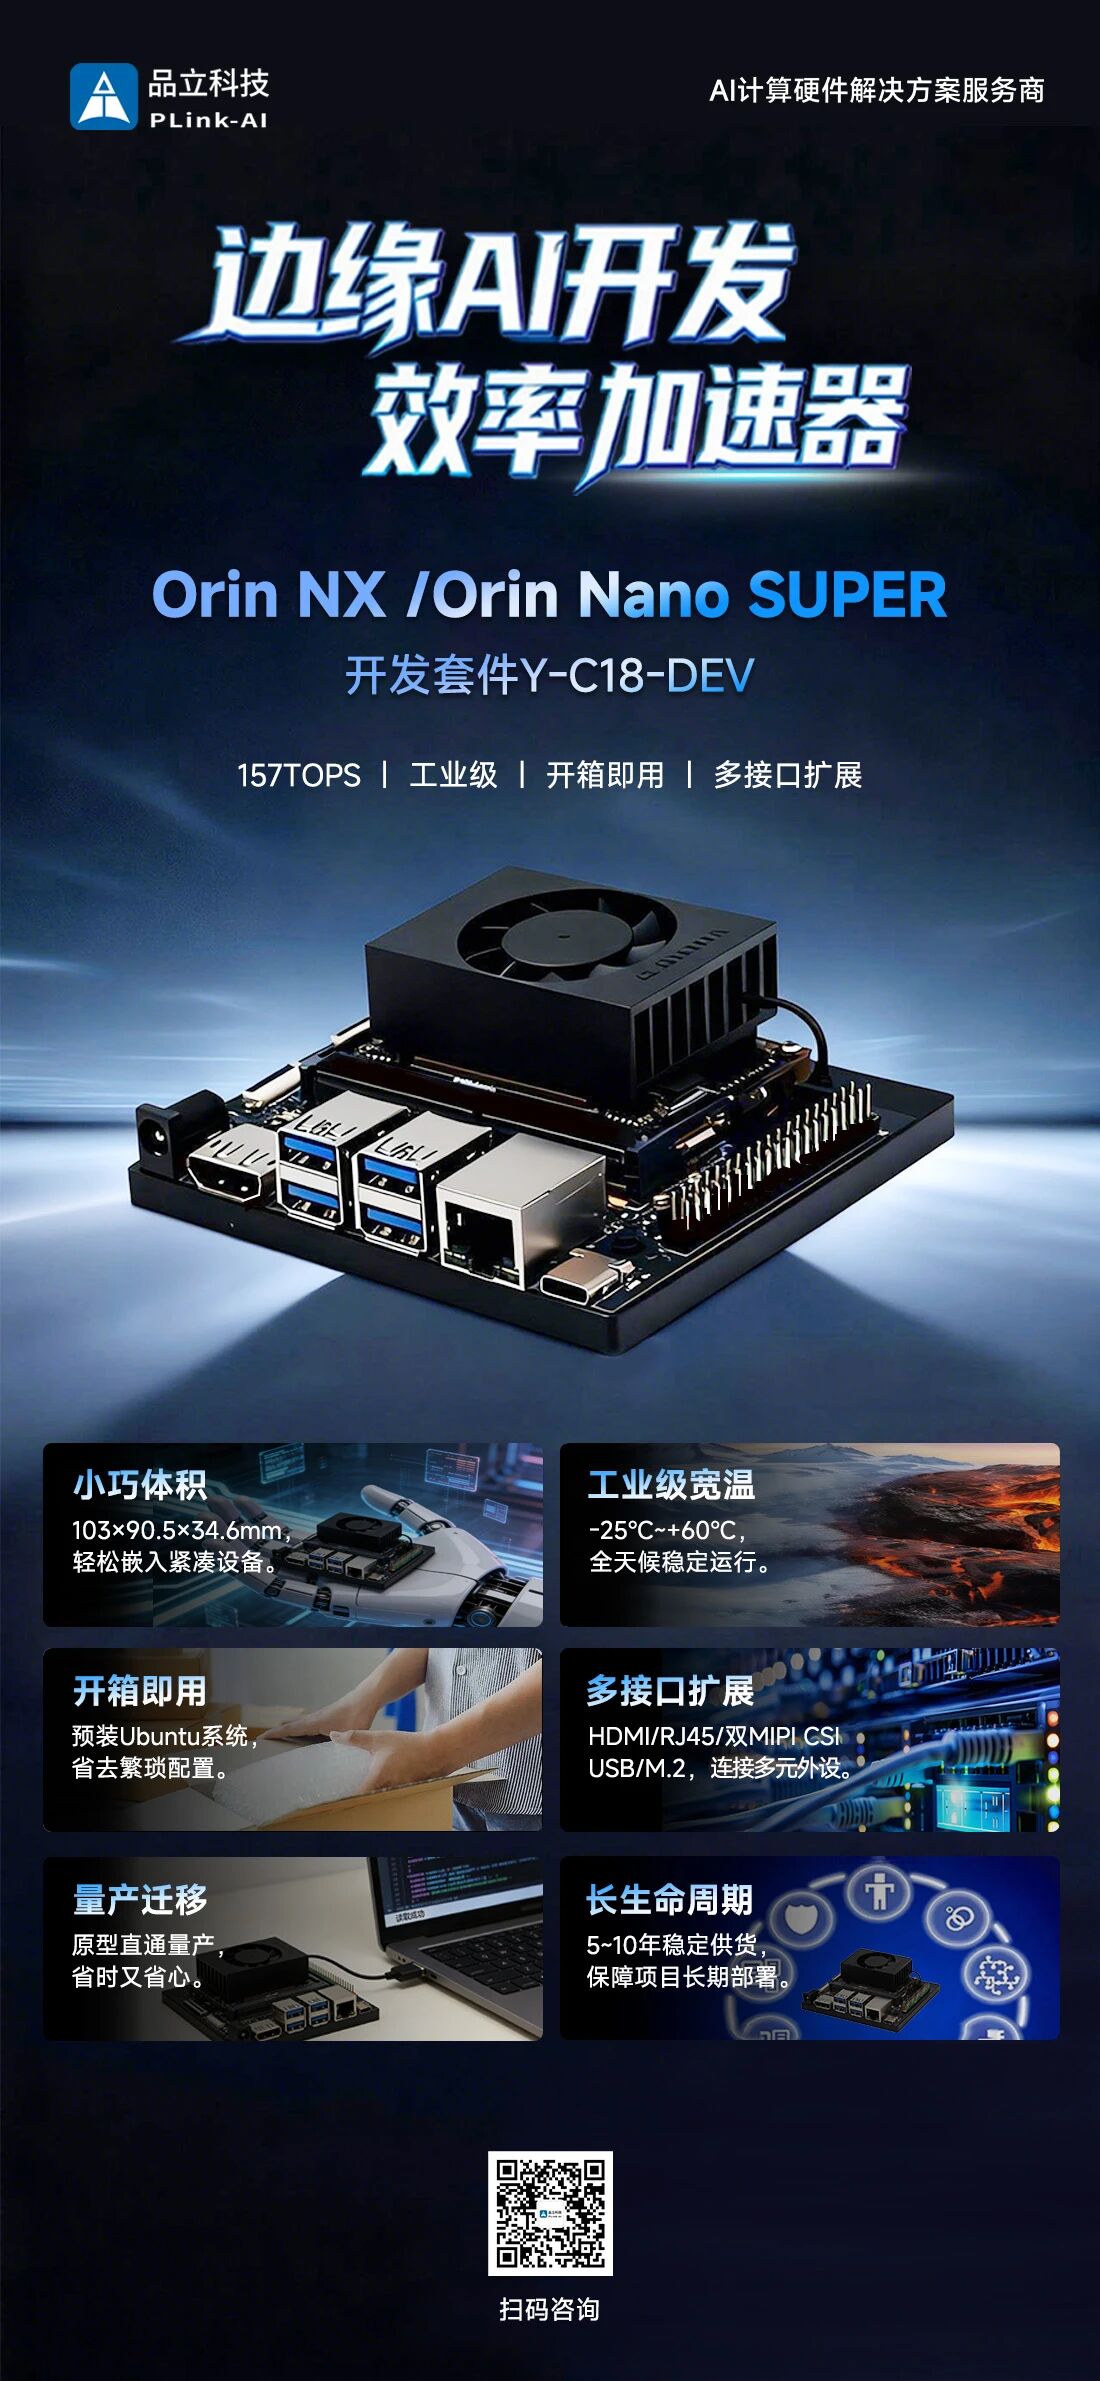
The PLink Technology Y-C18-DEV Development System is a high-performance AI edge computing device powered by NVIDIA Jetson Orin NX/Orin Nano series modules. With a palm-sized compact form factor, it enables local deployment of large AI models and real-time edge inference, providing powerful AI inference capabilities for real-time processing and analysis of massive amounts of data.
1. Unboxing
- Y-C18-DEV Main Unit ×1
- Power Adapter ×1
- SSD (Capacity Optional) ×1
- Bluetooth/Wi-Fi Module ×1
2. First Boot and Initial Setup
The Y-C18-DEV supports two mainstream operating modes: Direct Monitor Connection Mode (recommended for initial configuration and debugging) and Headless Mode (ideal for large-scale deployment and remote management). This section uses Direct Monitor Connection Mode as an example to explain the first boot process.
The device is designed to power on automatically when connected to power. Follow the steps below to complete the initial startup:
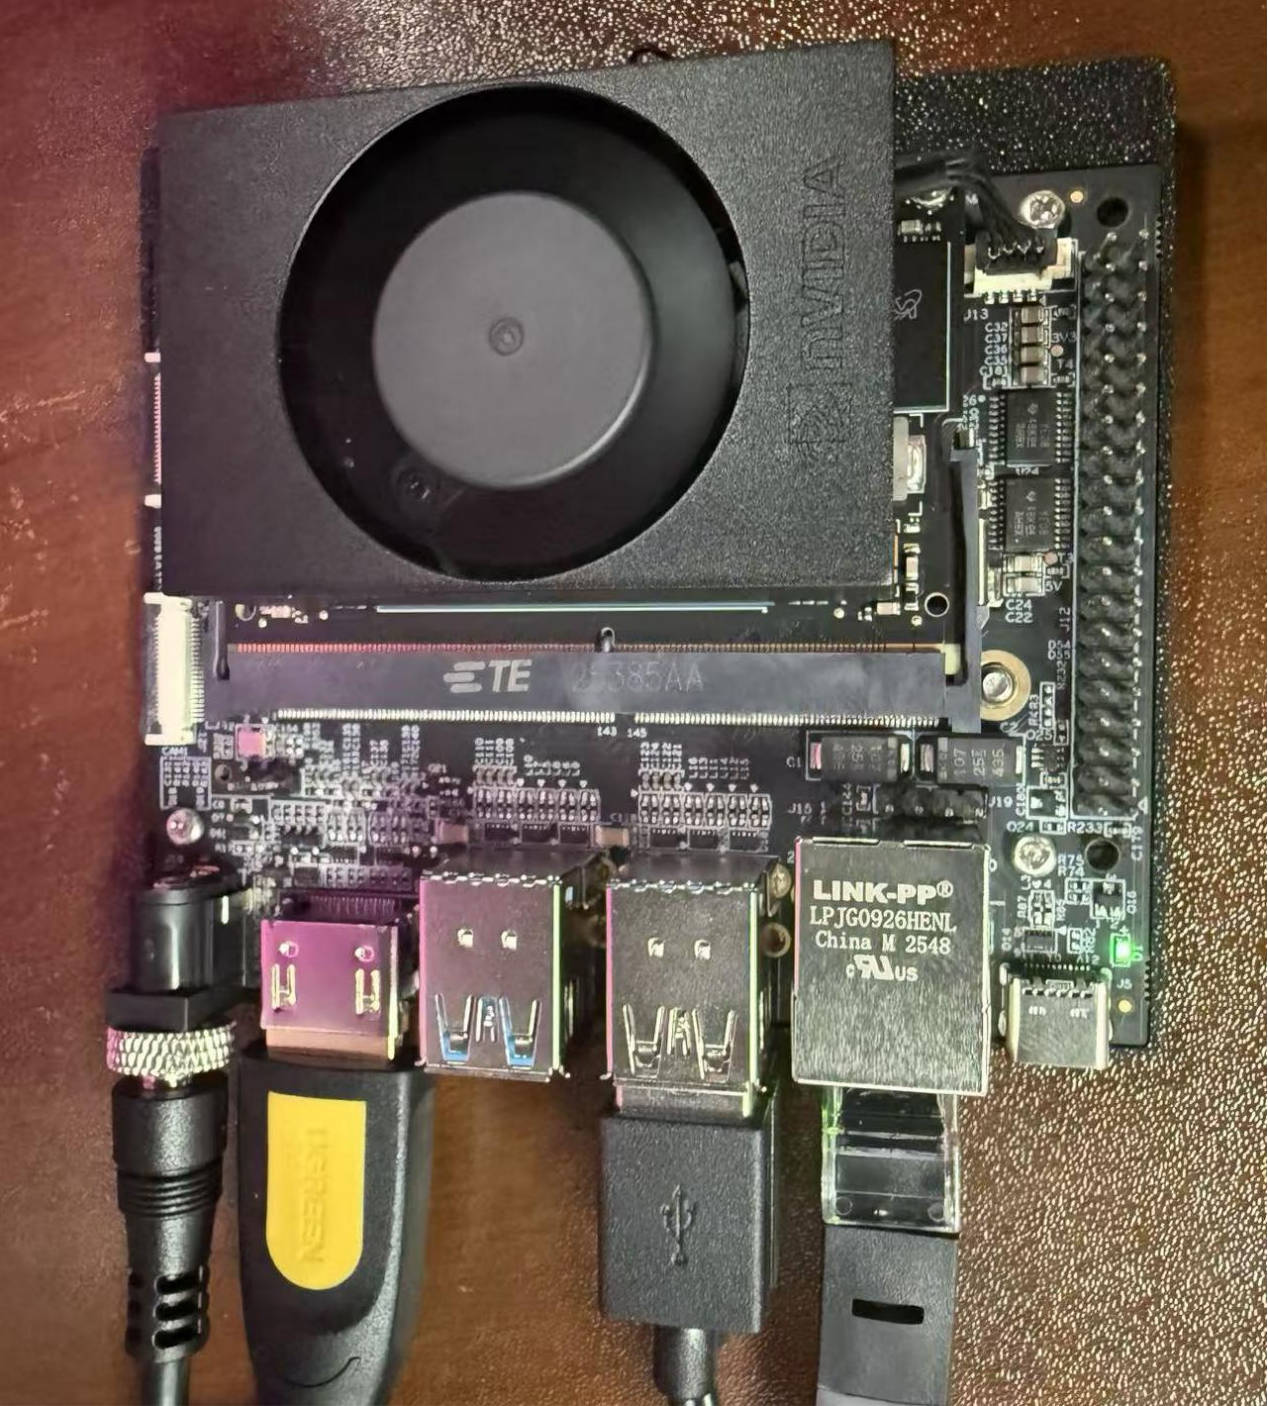
1. Hardware Connections
① Connect an HDMI monitor to the device's HDMI port;
② Connect a USB keyboard and mouse to the device's USB Type-A ports;
③ Connect the power adapter; the device will automatically power on and boot.
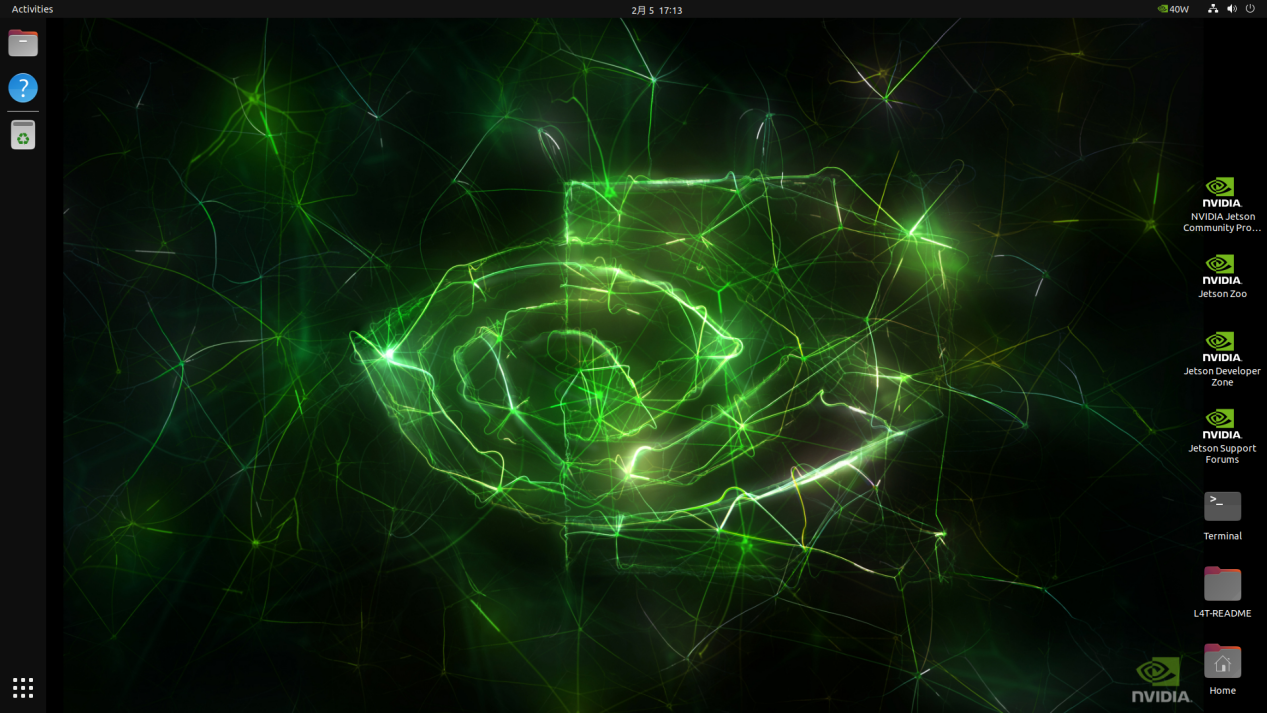
2. System Login and Basic Configuration
- System Login
After startup, the monitor will display the login screen. Enter the preset password (which can be customized according to customer requirements) to access the Ubuntu desktop environment.
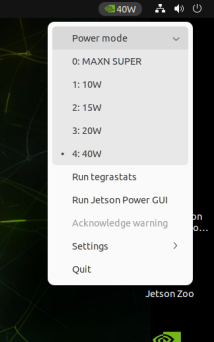
- Power Mode Configuration
Click the power indicator in the upper-right corner of the desktop to select a power mode. Choose the appropriate mode according to your computing requirements to balance performance and power consumption: 0: MAXN SUPER (Maximum Performance Mode), 1: 10W, 2: 15W, 3: 20W, 4: 40W.
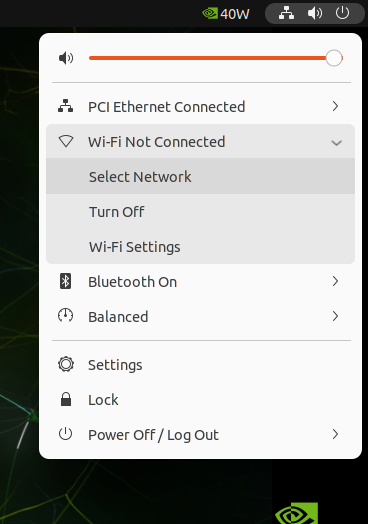
- Wi-Fi Connection
Click the network icon in the upper-right corner of the desktop, select "Select Network," choose the target Wi-Fi network, and enter the password to connect. This provides network access for subsequent operations.
3. System Information Verification
After entering the desktop environment, press Ctrl+Alt+T to open a terminal window and execute the following commands to view core hardware and system information and verify the initialization status.
- View CPU Information
Run lscpu
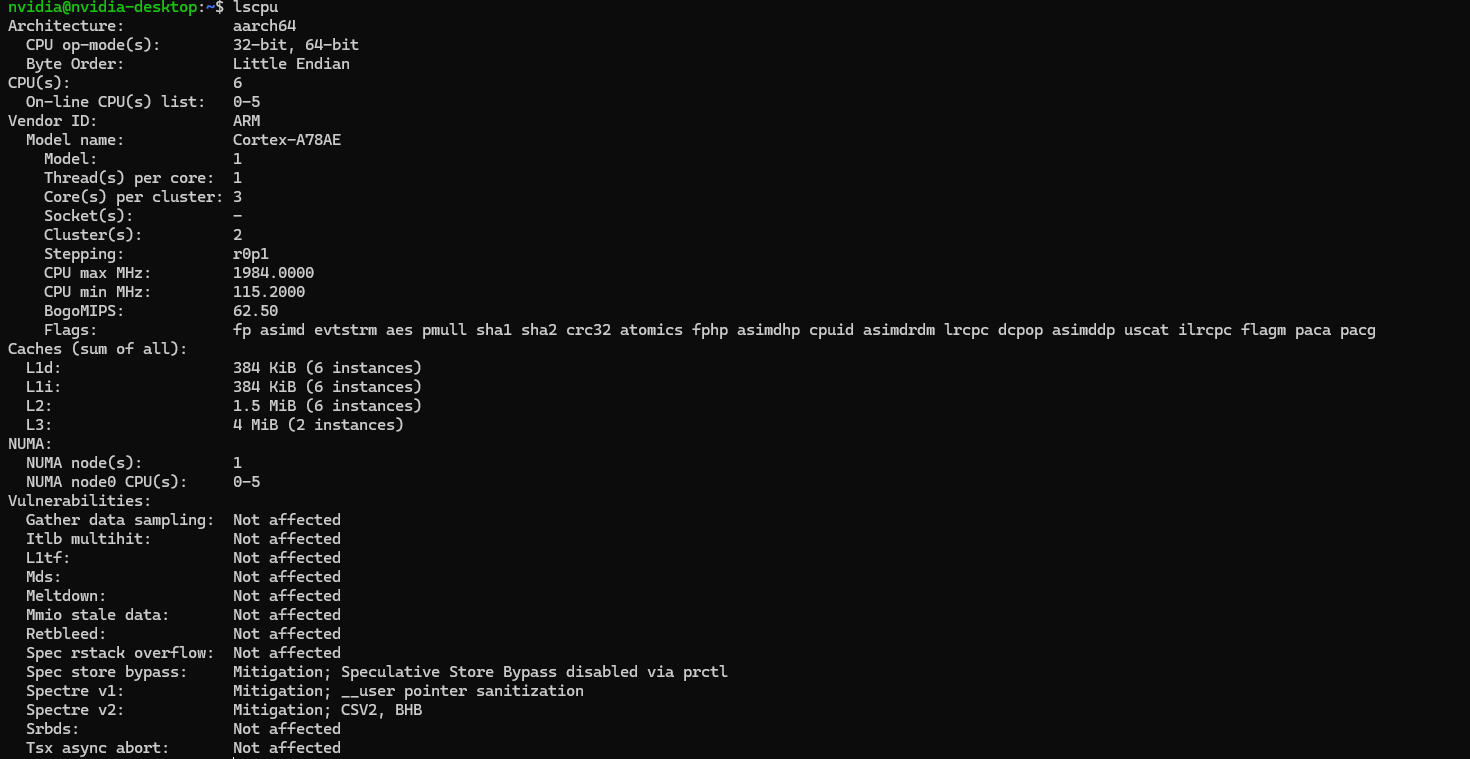
Displays detailed CPU information, including architecture, core count, clock frequency, and cache.
- View Memory Capacity
Run free -h

Using the Jetson Orin NX 8GB module as an example, this command displays total memory capacity, used/available memory, and cache information.
- View Storage Capacity
Run lsblk
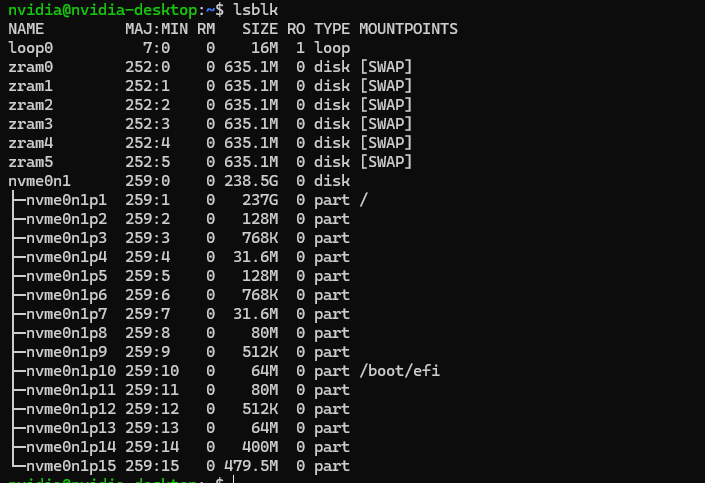
The image uses a 256GB NVMe SSD as an example. This command shows disk partitions, capacity of each partition, and mount points, verifying that the storage device is properly recognized.
- Check Pre-installed CUDA Version
Run nvcc -V

Verifies the GPU development environment.
- Check L4T Version
Run cat /etc/nv_tegra_release

L4T is NVIDIA’s Linux-based system for Jetson platforms, used to verify firmware and hardware compatibility.
- Check Kernel Version
Run uname -a
![]()
Displays the Ubuntu kernel version, system architecture (aarch64), and other system details, providing a reference for software installation and driver compatibility.
4. SSH Remote Login via Command Line
To support headless deployment in edge scenarios, the Y-C18-DEV supports SSH remote login by default. Devices within the same local network can be accessed via another computer for remote command-line operations. Steps are as follows:
1. Device Network Connection
Connect the device to a local network via Ethernet or Wi-Fi, ensuring it is in the same network segment as the remote control computer.
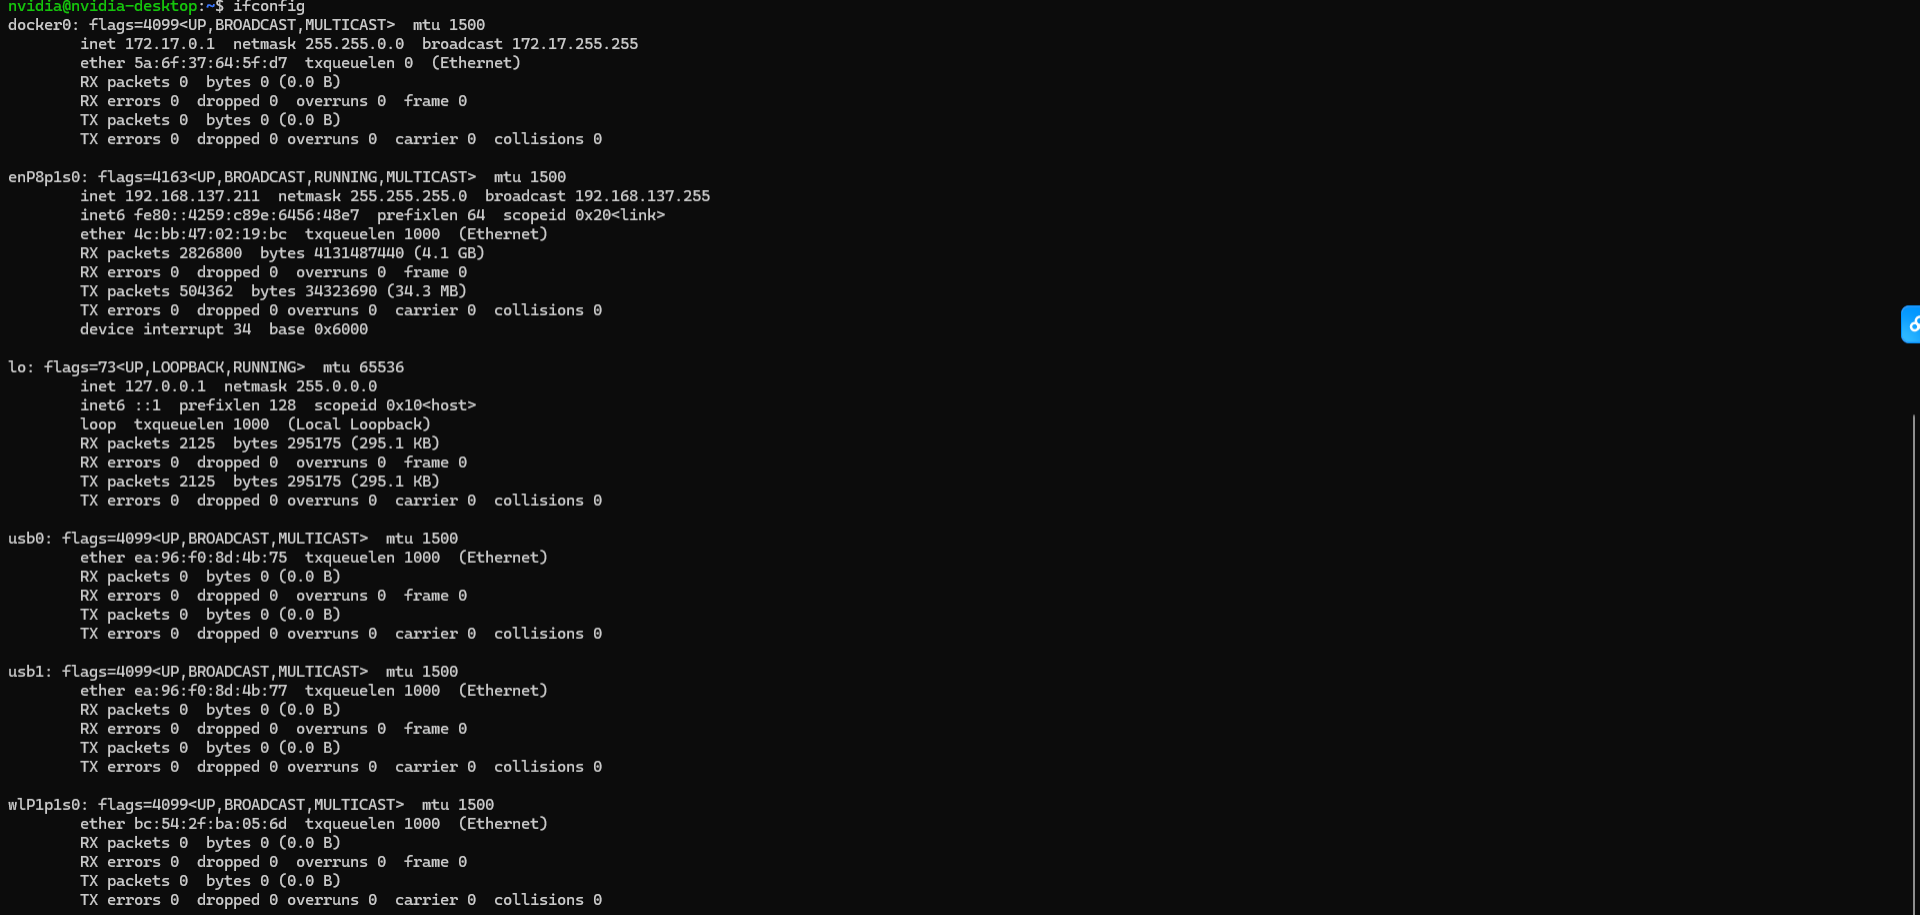
2. Obtain Device IP Address
Run ifconfig in the terminal and locate the inet address under either the Ethernet interface (enP8p1s0) or Wi-Fi interface (wLP1p1s0). This is the device IP address.
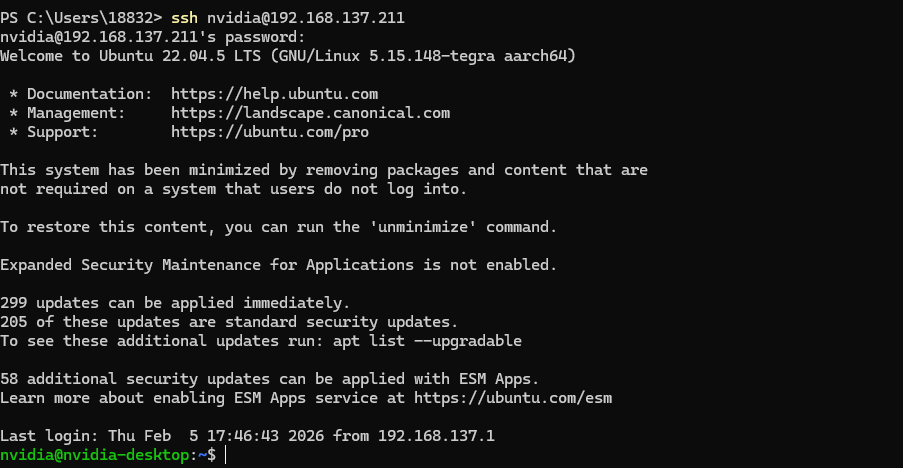
3. Remote Connection from Windows
① Press Win+R to open the terminal;
② Execute the SSH command (ssh username@device_ip_address);
③ On first connection, enter "yes" to confirm authentication, then input the device password. After verification, remote login will be established, enabling full command-line control.
5. Common Software Installation
After completing the basic setup, install the following core development tools and environments to begin edge AI development. All commands are executed in the terminal, and network connectivity is required.
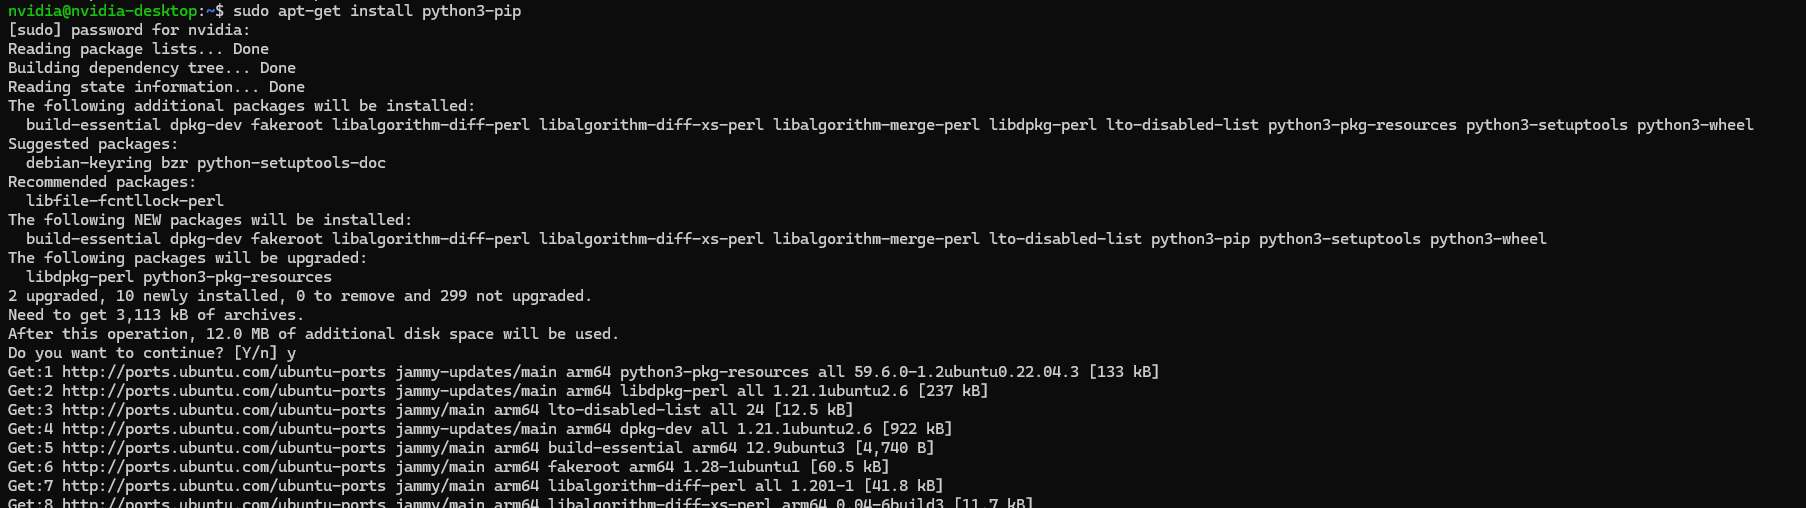
1. Install jtop
jtop is a monitoring tool designed for the Jetson platform, allowing real-time monitoring of CPU/GPU usage, temperature, power consumption, and other key metrics.
Run sudo apt-get install python3-pip
Run sudo pip3 install jetson-stats

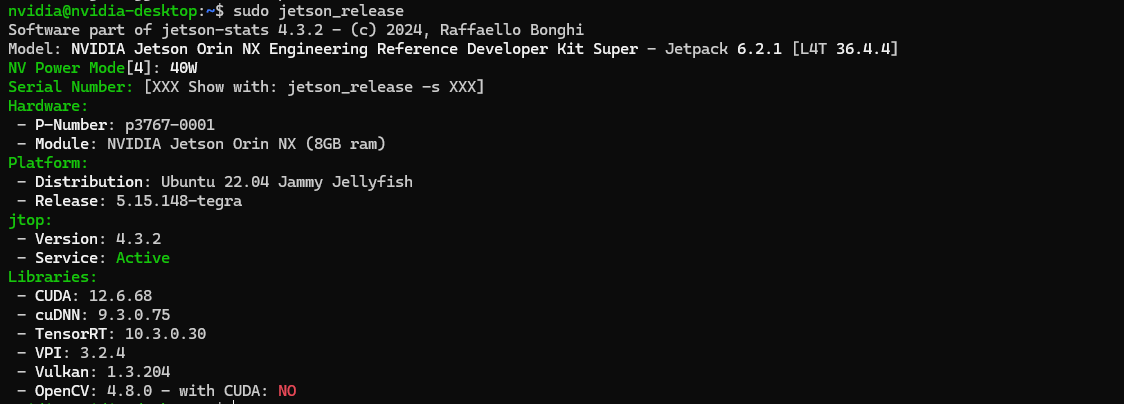
Run sudo jetson_release
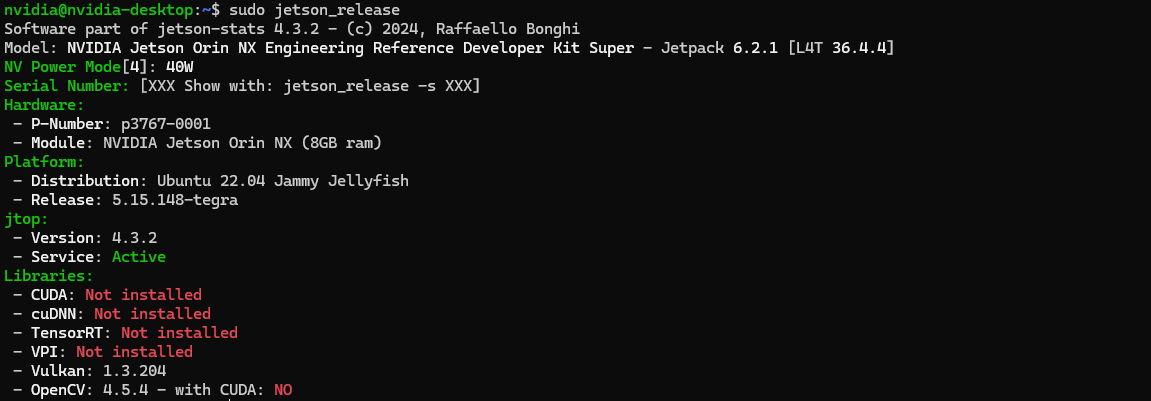
Run sudo jtop

2. Install JetPack
JetPack integrates core AI development libraries such as CUDA, cuDNN, TensorRT, and VPI, serving as the foundation for edge AI model development and inference deployment.
Run sudo apt-get update and sudo apt-get install nvidia-jetpack

Run sudo jetson_release to verify the installation. Once successful, the terminal will display the version information of core libraries, confirming that the development environment has been properly set up.
3. Install Docker and NVIDIA Container Toolkit
Enable containerized deployment of AI models and applications, achieving environment isolation, rapid deployment, and cross-device portability.
- Basic Installation and Configuration
Update software sources and install basic dependencies
Run sudo apt-get update and sudo apt install -y nvidia-container curl

Install Docker Engine and enable it to start on boot
Run curl https://get.docker.com | sh && sudo systemctl --now enable docker

Configure Docker
Run sudo nvidia-ctk runtime configure --runtime=docker
Restart Docker to apply configuration
Run sudo systemctl daemon-reload && sudo systemctl restart docker
Verify Docker installation (check version)
Run docker --version
![]()
- Set Default Runtime Configuration
After configuration, there is no need to manually specify --runtime nvidia when starting containers, and GPU scheduling is enabled by default:
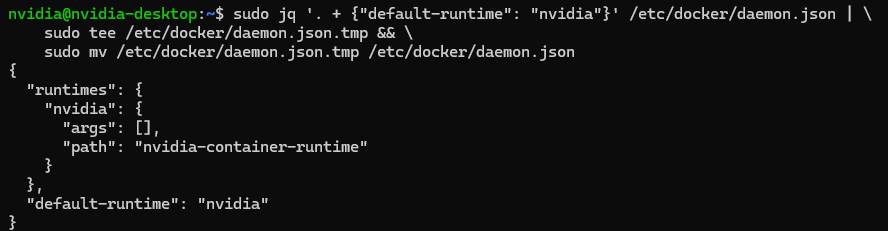
Run sudo apt install -y jq
sudo jq '. + {"default-runtime": "nvidia"}' /etc/docker/daemon.json |
sudo tee /etc/docker/daemon.json.tmp &&
sudo mv /etc/docker/daemon.json.tmp /etc/docker/daemon.json
At this point, the edge AI development environment built using the PLink Y-C18-DEV Development Kit is fully set up. It can be directly used for local deployment of large language models (such as LLaMA and Qwen), real-time inference of computer vision models (such as YOLO and Segment Anything), and prototyping of multimodal perception systems.